


Table of contents
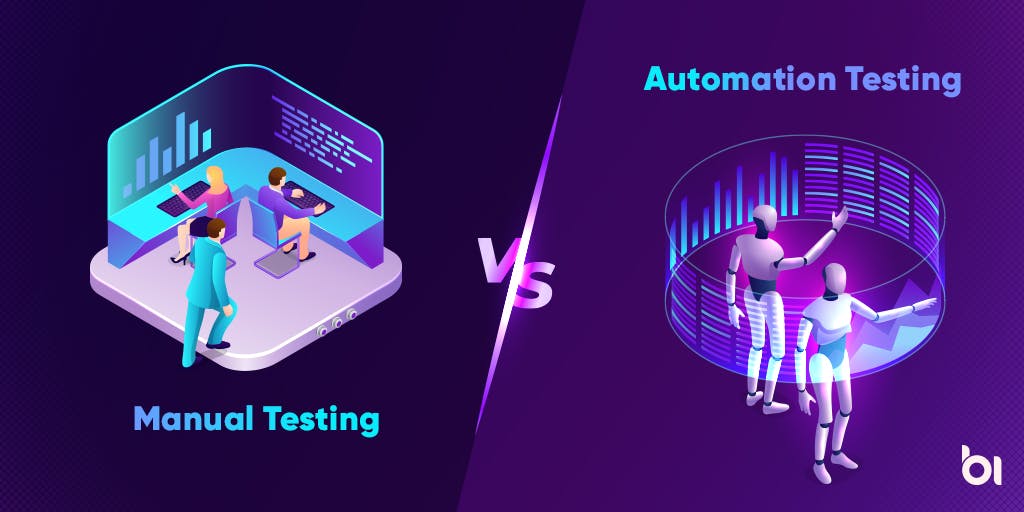
- Manual Testing vs. Automated Testing
- Why would you choose automated testing over manual testing?
- Why Use Manual Testing Over Automated?
- Challenges of Automation testing
- Automated testing
- Step 1: Create a new repository on GitHub/GitLab
- Step 2: Clone your repository, add code, commit, and push
- Step 3: Enable automated testing
- Step 4: Verify that tests have been automatically run
- Step 5: Add a test which reveals a problem
- Step 6: Open an issue on GitHub/GitLab
- Step 7: Fix the broken test
- Step 8: Open a pull request (GitHub)/ merge request (GitLab)
- Step 9: Accept the pull/merge request
Manual Testing vs. Automated Testing
Here's a quick comparison table of the differences between manual vs. automation testing.
| Aspect of Testing | Manual | Automation |
|---|---|---|
| Test Execution | Done manually by QA testers | Done automatically using automation tools and scripts |
| Test Efficiency | Time-consuming and less efficient | More testing in less time and greater efficiency |
| Types of Tasks | Entirely manual tasks | Most tasks can be automated, including real user simulations |
| Test Coverage | Difficult to ensure sufficient test coverage | Easy to ensure greater test coverage |
Why would you choose automated testing over manual testing?
Users choose automated testing over manual testing mainly because of time. In fact, automated testing was developed because manual testing is so time consuming. Automated testing is much faster.
The biggest problem of automation testing over manual testing is that it allows you to do more testing in less time. It increases productivity and expands how much you can test.
Why Use Manual Testing Over Automated?
A biggest problem of manual testing over automation or continuous testing is its focused attention. When a tester is manually creating and executing tests, there is more ability to handle complex and nuanced test scenarios.
While automated testing has advanced dramatically in its ability to handle sophisticated testing, sometimes only manual testing can be used. In manual testing, there is a lower risk for false negatives. (More false negatives can create extra work for DevOps teams to validate whether a reported error is true or false.)
Repetitive, high-frequency tests can easily be automated. But tests should not be automated if they occur infrequently, are high risk, or are subject to change.
Here are some instances when you would want live testing instead of automated testing:
- UX and exploratory testing.
- Complex test scenarios that are not efficient and sometimes not feasible to automate.
- Test scenarios that are only being validated once in a while.
Challenges of Automation testing
- Test Case Prioritization.
- Communication and Collaboration.
- Finding the right Testing Framework or Tool.
- Taking Real User Conditions into Account.
- Finding the right skills.
- Upfront Investment.
Automated testing
We will now learn to set up automatic tests using either GitHub Actions or GitLab CI - you can choose which one to use and instructions are provided for both.
Step 1: Create a new repository on GitHub/GitLab
Begin by creating a repository called (for example) example-ci.
Before you create the repository, select “Initialize this repository with a README” (otherwise you try to clone an empty repo).
Step 2: Clone your repository, add code, commit, and push
Clone the repository.
Add a file example.py containing:
def add(a, b):
    return a + b


def test_add():
    assert add(2, 3) == 5
    assert add('space', 'ship') == 'spaceship'


def subtract(a, b):
    return a + b  # <--- fix this in step 7


# uncomment the following test in step 5
#def test_subtract():
#    assert subtract(2, 3) == -1
Test example.py with pytest.
Then stage the file ( git add ), commit ( git commit -m "some commit message" ), and push the changes ( git push origin main ).
Step 3: Enable automated testing
Github:
In this step we will enable GitHub Actions. Select “Actions” from your GitHub repository page. You get to a page “Get started with GitHub Actions”. Select the button for “Configure” under Python Application:
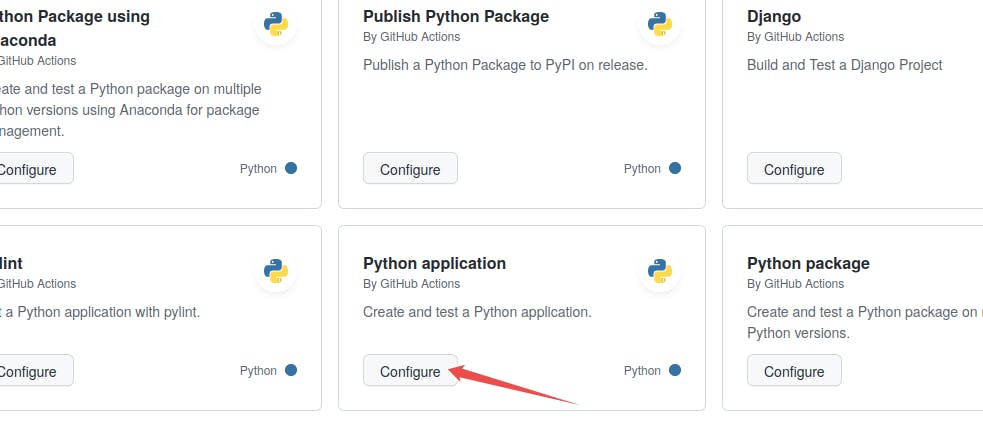
Select “Python application” as the starter workflow.
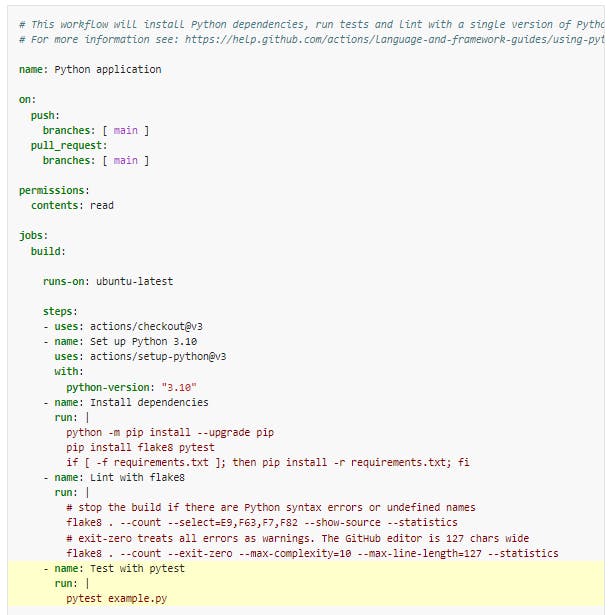
GitHub creates the following file for you in the subfolder .github/workflows . Add pytest example.py to the last line (highlighted):
Commit the change by pressing the “Start Commit” button:
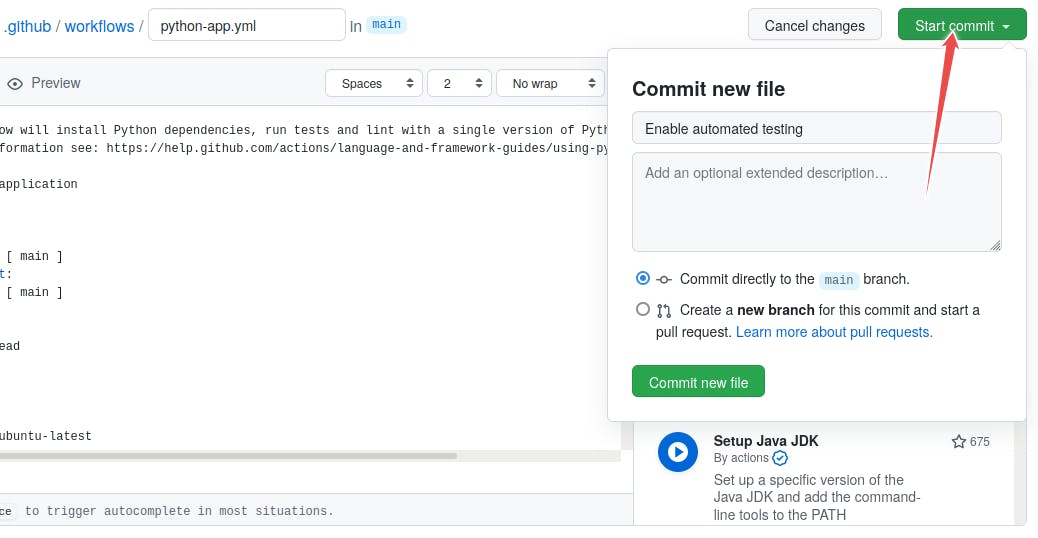
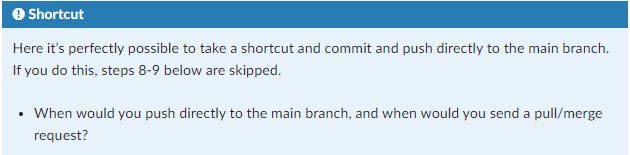
Committing the file via the GitHub web interface: follow the flow, give it some commit name. You can commit directly to master.
Gitlab:
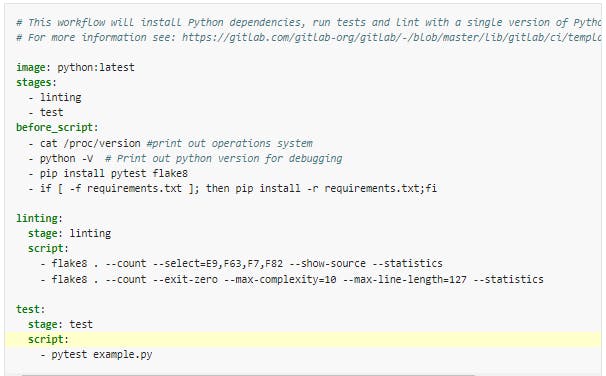
In this step we will enable GitLab CI. Select “CI/CD” from your Gitlab sidebar of the project. You get to a page “Editor”. (Instead you can also click on “Add CI/CD” on the main page or just add a .gitlab-ci.yml file the result is identical.
Copy the following code snippet into the file. Gitlab will save it as .gitlab-ci.yml. Add pytest example.py to the last line (highlighted):
Commit the change by pressing the “Commit changes” button:
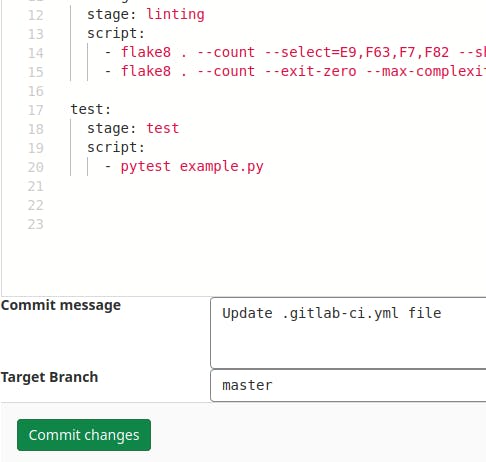
Committing the file via the GitLab web interface: follow the flow, give it some commit name. You can commit directly to master.
Step 4: Verify that tests have been automatically run
Github:
Observe in the repository how the test succeeds. While the test is executing, the repository has a yellow marker. This is replaced with a green check mark, once the test succeeds:

Green check means passed.
Also browse the “Actions” tab and look at the steps there and their output.
Gitlab:
Observe in the repository how the test succeeds. While the test is executing, the repository has a blue marker. This is replaced with a green check mark, once the test succeeds:
Green check means passed.
Also browse the “Pipelines” tab and look at the steps there and their output.
Step 5: Add a test which reveals a problem
After you committed the workflow file, your GitHub/GitLab repository will be ahead of your local cloned repository. Update your local cloned repository:
$ git pull origin main
Hint: if the above command fails, check whether the branch name on the GitHub/GitLab repository is called main and not perhaps master.
Next uncomment the code in example.py under “step 5”, commit, and push. Verify that the test suite now fails on the “Actions” tab (GitHub) or the “CI/CD->Pipelines” tab (GitLab).
Step 6: Open an issue on GitHub/GitLab
Open a new issue in your repository about the broken test (click the “Issues” button on GitHub or GitLab and write a title for the issue). The plan is that we will fix the issue through a pull/merge request.
Step 7: Fix the broken test
Now fix the code on a new branch, you can call it yourname/bugfix. After you have fixed the code on the new branch, commit the following commit message "restore function subtract; fixes #1" (assuming that you try to fix issue number 1).
Then push to your repository.
Step 8: Open a pull request (GitHub)/ merge request (GitLab)
Go back to the repository on GitHub or GitLab and open a pull/merge request. In a collaborative setting, you could request a code review from collaborators at this stage. Before accepting the pull/merge request, observe how GitHub Actions/ Gitlab CI automatically tested the code.
If you forgot to reference the issue number in the commit message, you can still add it to the pull/merge request: my pull/merge request title, closes #1.
Step 9: Accept the pull/merge request
Observe how accepting the pull/merge request automatically closes the issue (provided the commit message or the pull/merge request contained the correct issue number).
That's all for this blog, I hope you will learn something new. And feel free to share your thoughts and feedback, Thanks for reading.
Feel free to reach out me 👀
Twitter 🖱
LinkedIn 🖱
Github 🖱